

Keysmith and Keyboard Maestro are both great tools to create custom keyboard shortcuts for your Mac. We often get asked to compare Keysmith and Keyboard Maestro since, on the surface, they seem to be pretty similar tools.
Here’s an analogy: if using Keyboard Maestro is like driving a stick shift, using Keysmith is like driving an automatic. Both are fine choices – it’s largely a matter of personal preference.
Like driving an automatic car, though, Keysmith is so much easier to use that we think it’s the best choice for most people.
I’ll say up front that while I’ve used and enjoyed Keyboard Maestro for years, I’ve never taken one of the paid courses available to learn all the ins and outs. If you think I’ve mischaracterized what Keyboard Maestro can do, please let me know.
That said, let’s break it down.
Interface
One macro I use every day is a Slack macro that opens up the #engineering channel. It takes advantage of Slack’s ⌘K shortcut to open up the search bar, types “engineering”, and then presses enter.
Here’s what the macro to do that looks like in Keysmith:
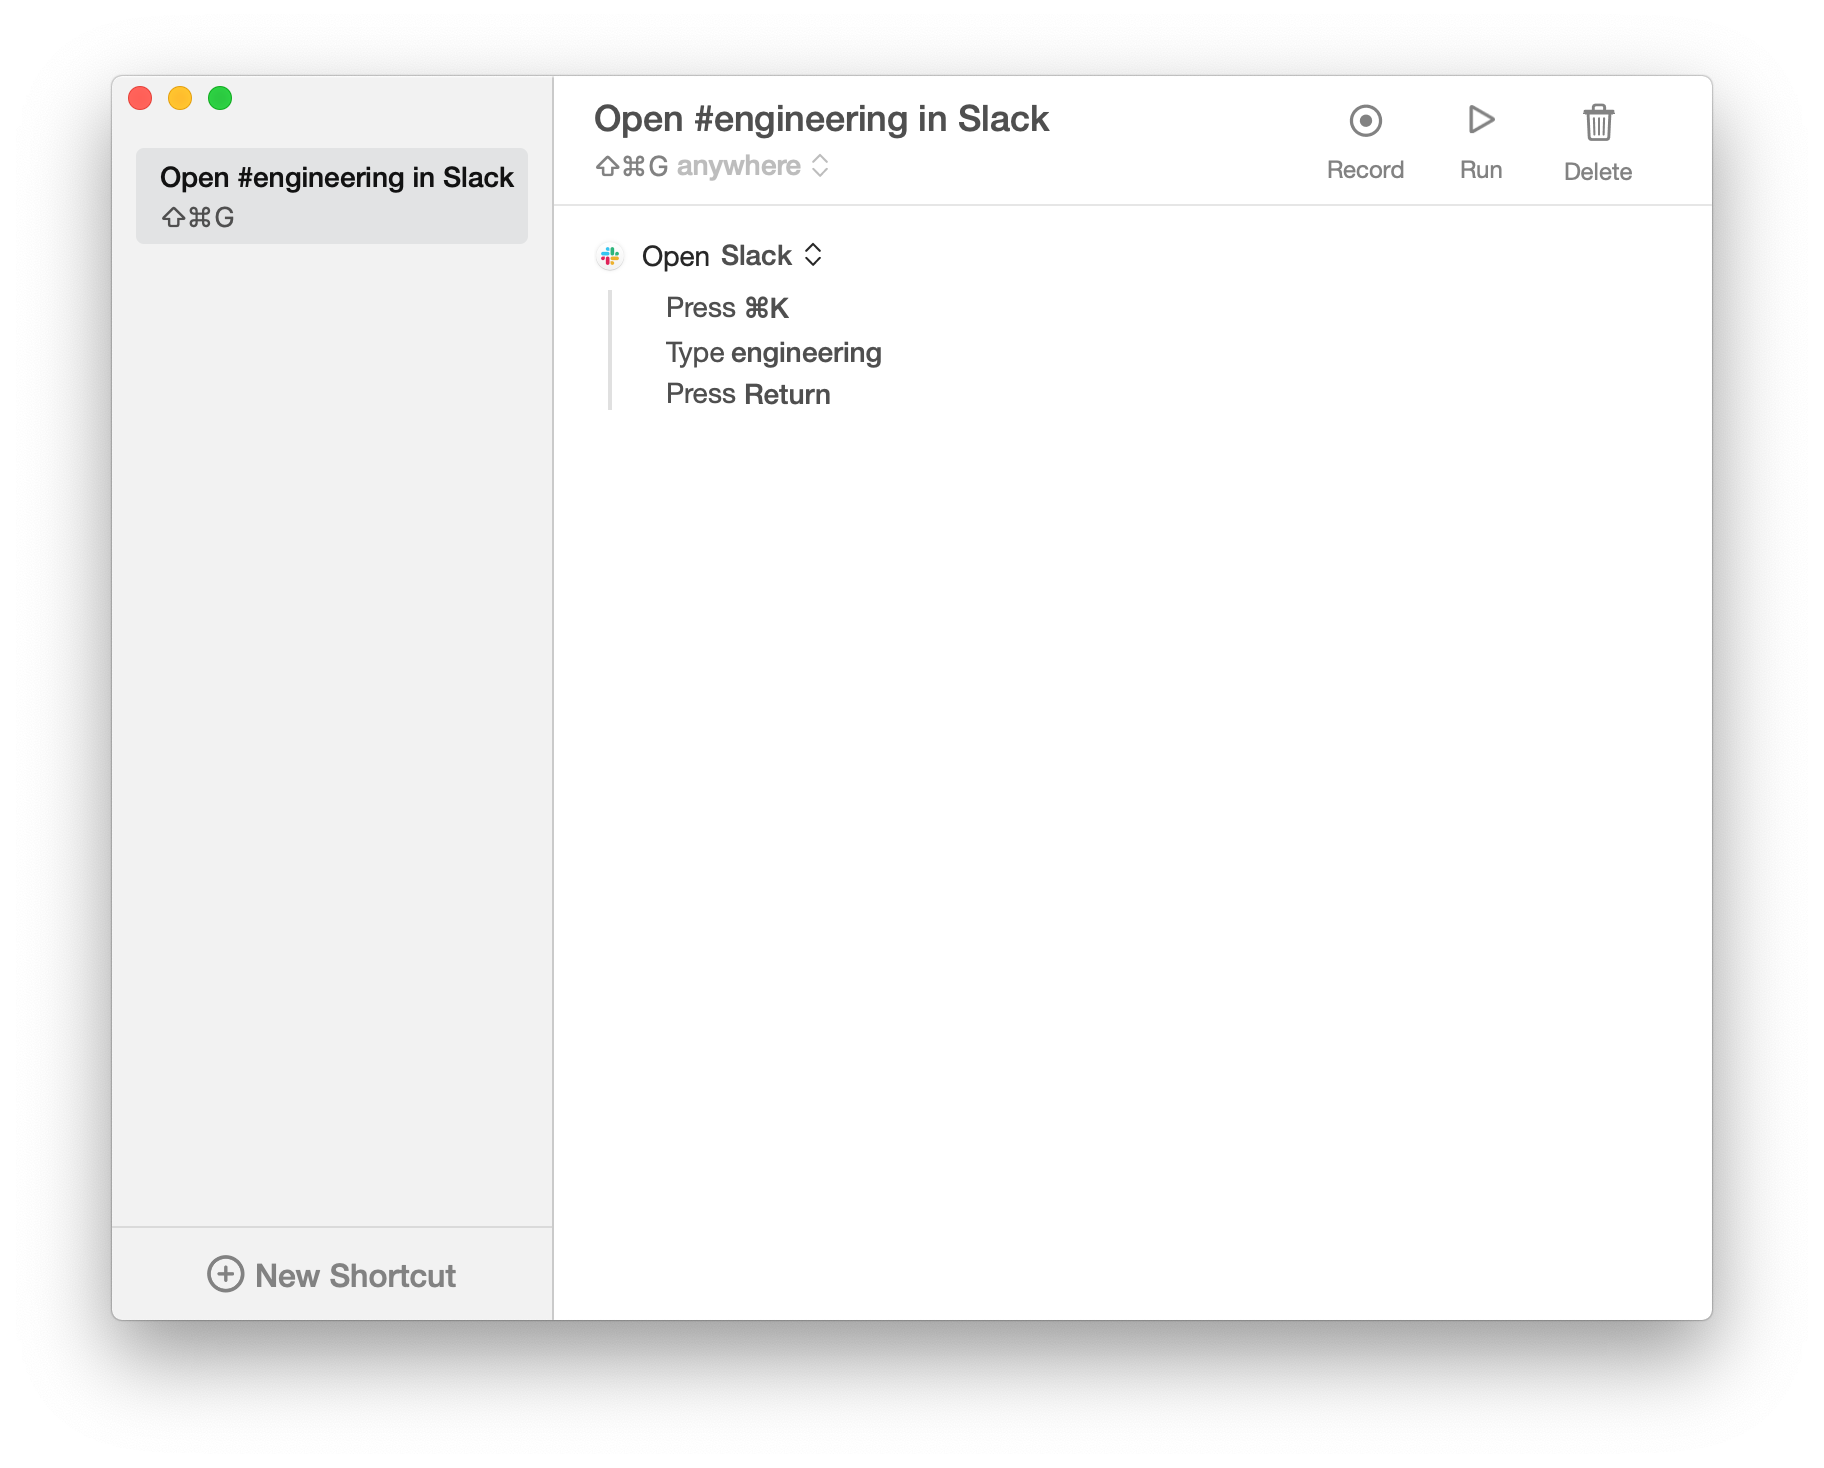
Pretty straightforward. It says what it does in a few words. Now here’s that same macro in Keyboard Maestro:
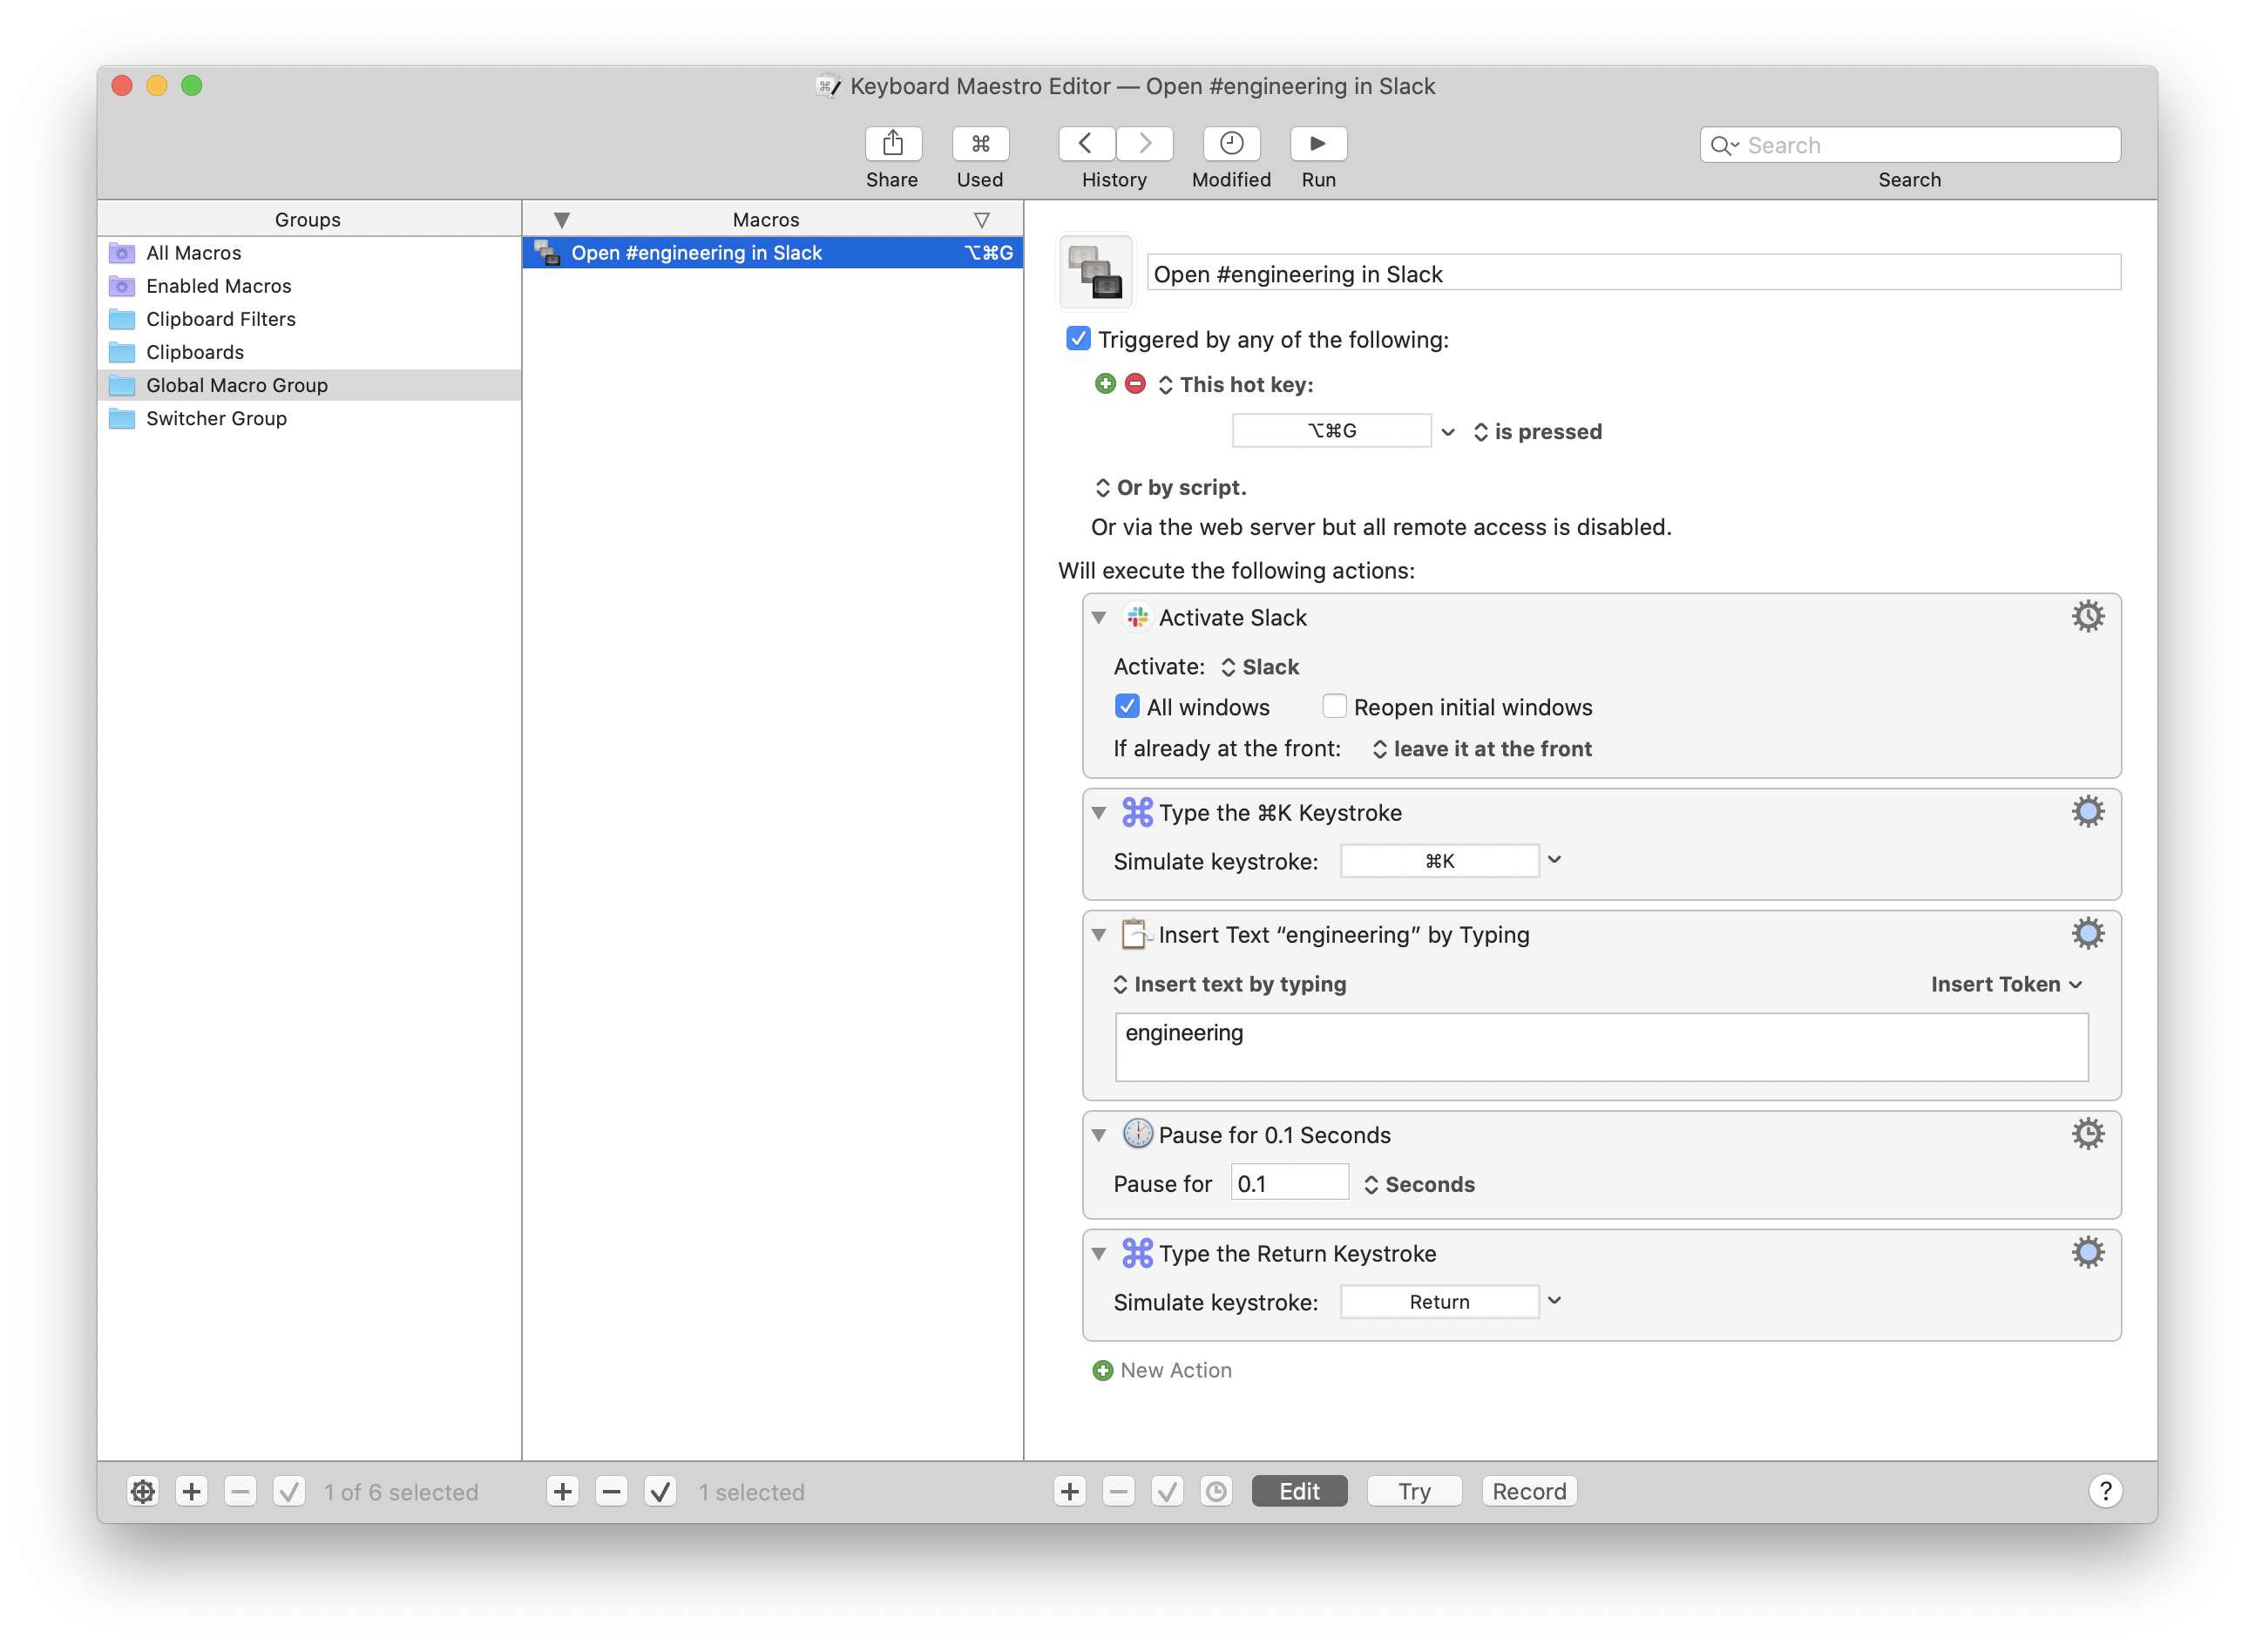
It’s doing the same thing, but Keyboard Maestro’s UI is significantly more complicated. It’s cluttered with icons and indentation to support the dozens of configurations it might have to display. I also had to add a pause action toward the end to make it work because Slack has gotten sluggish. (The Keysmith macro works without explicitly waiting because it automatically waits a short time after all actions to smooth out hiccups like this. If Slack's delay was longer, I'd have to add a manual wait in Keysmith too.)
Even for someone that has used Keyboard Maestro for years, this interface can be confusing and overwhelming, and it can hide important functionality. Keysmith whittles those options down to the most commonly used ones and presents them in a much cleaner way.
Creating a New Macro
Creating a macro in Keysmith is really simple. Hit record, do the thing you want to create a macro for, and then hit stop. Keysmith is aware of buttons, lists, windows, and other UI elements, so it can understand what you’re doing (e.g. clicking on the Submit button) and do the right thing when there’s ambiguity.
To create a macro in Keyboard Maestro, you build the macro one action at a time by choosing from a list of hundreds of actions. In practice, we’ve found that while the builder method allows for more flexibility, the recording method works for 95% of use cases and is much faster.
And that speed opens up new use cases. Because there’s so little overhead in creating a macro, you don’t have to think about whether it’s worth the time. You just hit record and make the macro.
Recording lets Keysmith identify specific UI elements you click on or interact with, which helps it choose the right element later on when playing back the macro. Keyboard Maestro, on the other hand, can identify UI elements only by simple properties like name.
And the flexibility that comes with Keyboard Maestro’s solution is also a double-edged sword - much of its functionality goes unnoticed in a sea of over three hundred actions to choose from.

That power can’t do as much good when it’s buried like that. Take this question on the Keyboard Maestro forums, for instance. Someone asks for help building a macro to perform the simple task of opening an app and typing a keystroke. The complexity is overwhelming - especially to newcomers.
It’s worth noting that you can make macros with Keyboard Maestro by recording, and you can build macros one action at a time with Keysmith. It’s just not their strengths. Keysmith is better at recording, and Keyboard Maestro is better at building.
Keysmith Just Works
Let’s say you want to wait for a disabled button to become enabled before clicking it.
In Keyboard Maestro, you have to specifically add a “Pause Until” action. But there are so many different ways to pause, it takes six steps just to add it: Click Add Action > Search for “pause” > Double click Pause Until > Click Add Condition > Select Button Condition > Type the name of the button.
Keysmith does this by default. There’s nothing to do. Zero steps. It just works.
Here’s another example: if you’ve got a macro that goes and clicks on some buttons, it can be annoying to have your mouse left hovering over the last thing it clicked. Both apps make it possible to move the mouse back to where it was when you started the macro.
In Keyboard Maestro, you calculate the starting mouse position, store it in a variable, and then at the end you set the mouse position to what’s stored in the variable. It looks like this:
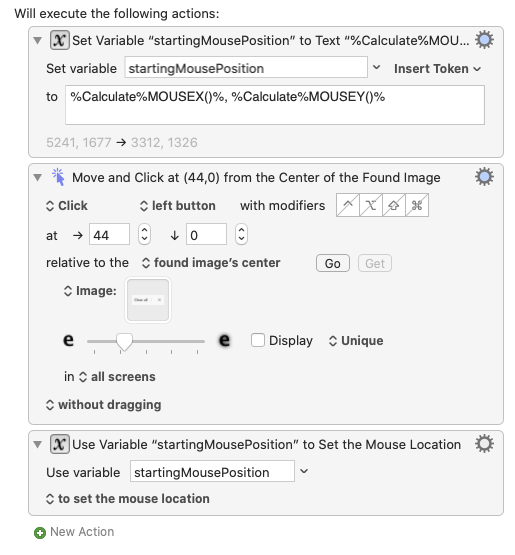
Keysmith, once again, does this by default. There’s nothing to do. Zero steps. It just works.
Keysmith is also smart about inserting pauses where necessary. It won’t catch every case, but most of the time it’s faster than manually inserting half-second Pause actions in a Keyboard Maestro macro.
Web Support
Keyboard Maestro has pretty limited support for interacting with web apps. The best way I’ve found is to use “Click at Found Image” actions, which let you take a screenshot of something and then Keyboard Maestro will search for that image on your screen and click on it.
I’ll be honest: it is very cool.
Unfortunately, it doesn’t always work. If the button is scrolled off the page, it (obviously) won’t find the image. And if there are multiple buttons that look the same, it can’t disambiguate them. Plus, it can be inconsistent and slow, especially if you’ve got multiple displays for it to search through.
Keysmith was made to work on the web. The Mac app comes with a browser extension that lets it see buttons, links, lists, text fields, etc – even if they’re scrolled off the page. It can disambiguate based on where on the page the button is. And it knows when it needs to wait for pages to load, like in this macro that navigates across multiple pages:
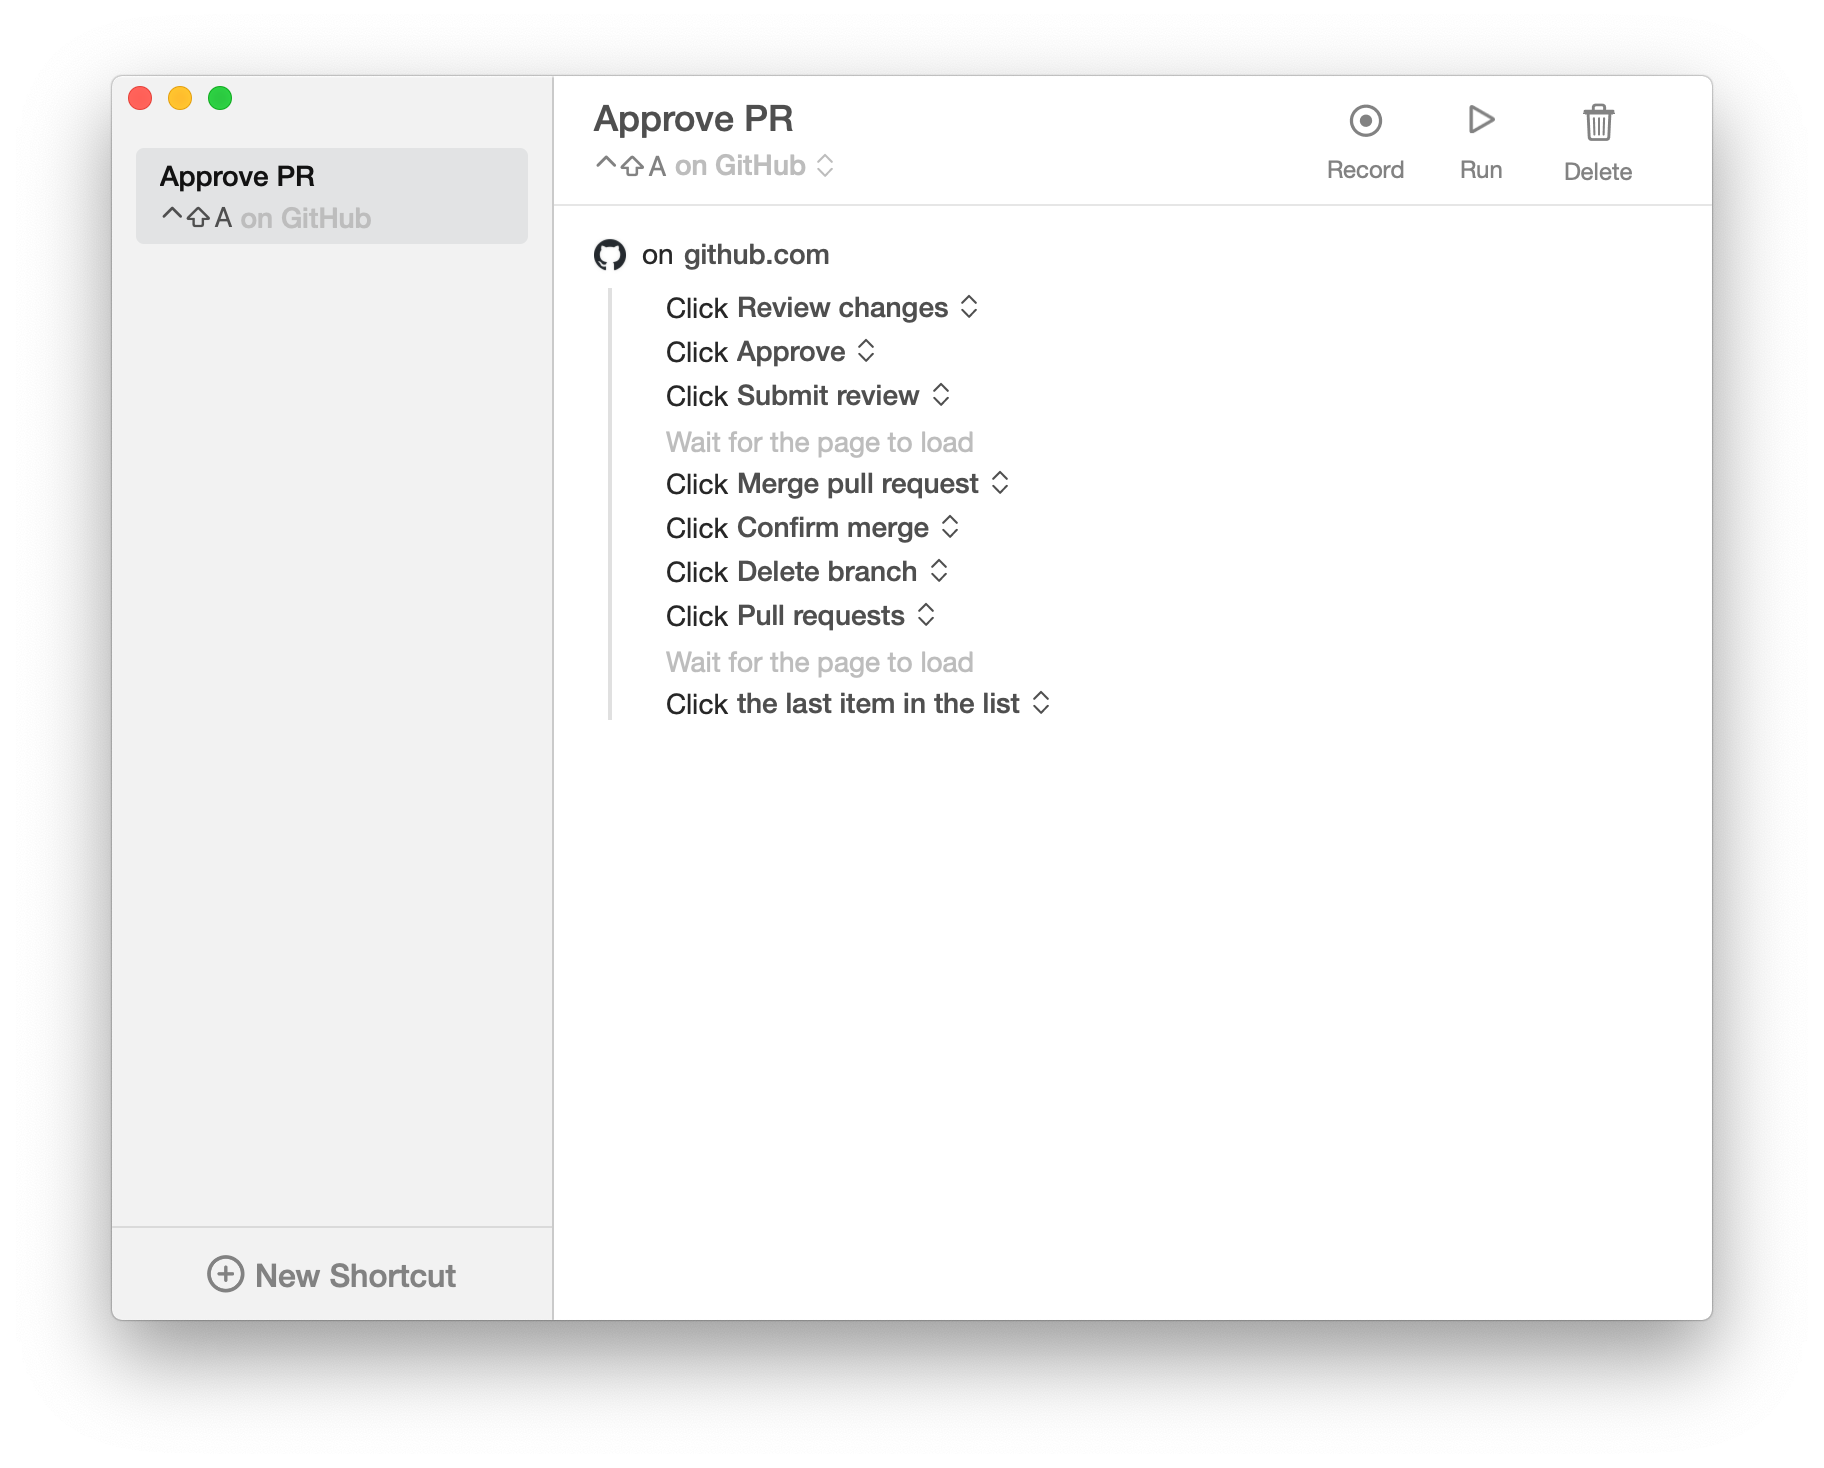
The extension also makes it possible to set a hotkey that only works on a specific website, like how the one above only works when I’m on GitHub.
The web is so important these days that most of my Keysmith macros involve a website in some way, which is something Keyboard Maestro can’t match at all.
To be clear, Keyboard Maestro also has a set of browser-specific actions you can use. I've just found the screenshot method to be the easiest for me personally.

Both Apps Have Their Place
Keysmith is simpler, and covers most use cases. Keyboard Maestro comes with a more thorough feature set, but it’s more complicated to use.
Keysmith is like a higher level abstraction that’s optimized for the vast majority of use cases. But like any higher level abstraction, this means that while Keysmith makes a lot of macros easier to create, some things are just not possible.
For example, there’s just no way to get Keysmith to click on a disabled button. Keyboard Maestro will gladly do this by default, Keysmith won’t do it even if you wanted to.
Keyboard Maestro exposes programming functionality like conditionals, loops, variables, and even semaphores and a debugger! Keysmith doesn’t have any of that, though we do plan to support conditionals and loops in the future.
Keyboard Maestro has plenty of actions that Keysmith doesn’t support, like support for MIDI output, OCR, and writing to a file.
And in addition to activating a macro with the keyboard, Keyboard Maestro allows for 27(!) other types of triggers. You can set it to be activated when your audio output device changes, at a certain time, or even when you draw a certain gesture with your mouse. (These triggers are so powerful that we wrote a blog post on how Keysmith can work with other apps like Keyboard Maestro.)
But for most people, what Keysmith can do is more than enough. We’ve put a lot of care into making it as simple as possible, and no simpler.
So when people ask which tool is better, I recommend trying both. I think you’ll see the difference pretty quickly, and you can decide for yourself which is right for you.